
Audience
Students and employees
Steps to get started
Like most ECU systems, email and calendar uses Microsoft 365 secure authentication. See our 2FA + Password Setup Guide for detailed instructions.
- Simply log into https://email.ecuad.ca/ from any web browser
- You may be prompted to complete a 2FA challenge
- This Outlook for the Web (OWA) application is the simplest, fastest and easiest to use interface
Your license allows you to install Microsoft 365 apps on up to five devices including computers, tablets and smartphones.
- Microsoft Outlook
- Included in Windows 11
- Available to download for macOS, iOS (from the App Store) and Android (from Google Play)
- The mobile and new versions provide a simple interface matching the Outlook browser experience
- An older, more complex interface is also available for Windows (i.e., Outlook Classic) and macOS (i.e., Legacy Outlook)
- Apple Mail
- Included in macOS and iOS only
- Other Email Apps
- Third-party email apps such as Thunderbird or Gmail are not supported for ECU email.
Instructions (Outlook)
|
|

|
Step 1:
Launch Outlook, enter your email address and click Connect (Windows) or Continue (macOS).
- If Outlook does not provide this prompt (e.g., if you already have another account connected), proceed to Step 2.
- Or, skip directly to Step 4.
|
|


|
Step 2:
Launch Outlook and navigate to File \ Account (Windows) or Settings \ Accounts (macOS).
|
|

|
Step 3:
Click + Add Account and add your email address when prompted.
|
 |
Step 4:
Enter your password, click Sign in and complete the 2FA challenge if prompted.
Your account is now connected.
|
Instructions (Apple Mail)
|
|

*click on the image to zoom in*
|
Step 1:
In macOS launch System Settings \ Internet Accounts.
In macOS Monterey (12.x) and earlier, open System Preferences \ Internet Accounts.
|
|

|
Step 2:
Select Microsoft Exchange account.
|
|


|
Step 3:
Enter your email address then click Sign In (twice) to continue.
|
|
Step 4:
Enter your password, click Sign in and complete the 2FA challenge if prompted.
Your account is now connected.
|
 |
Step 5:
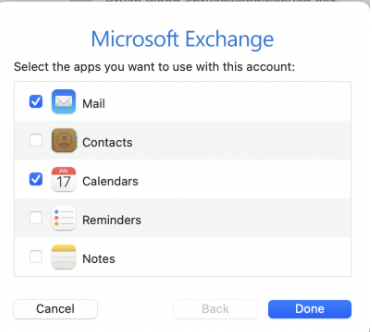
Select Mail and Calendars, as well as other apps you’d like to use with this Exchange Account, such as Contacts and Reminders.
You can adjust these settings later if needed.
|
Instructions
|
|

|
Step 1:
Use the ECU Signature Generator to create a signature that will appear at the bottom of your email messages
|

|
Step 2:
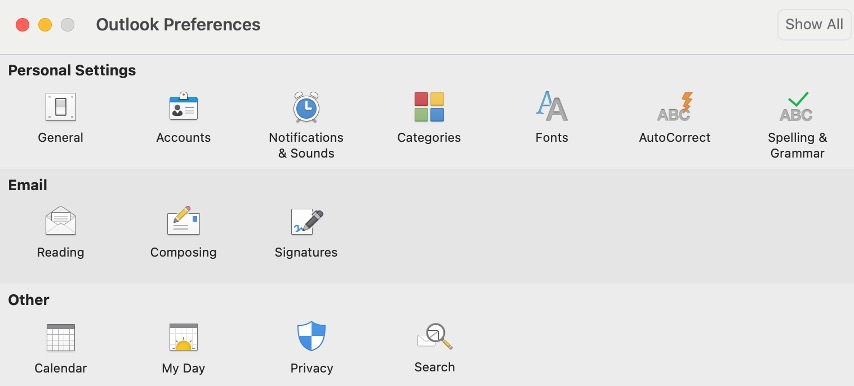
Navigate to Settings \ Email \ Signatures (macOS) or Message \ Signature (Windows) or Settings \ Accounts \ Signatures (Outlook on the Web).
Or, see this guide for other version of Outlook or Outlook on the Web (OWA).
|
|
|
Step 3:
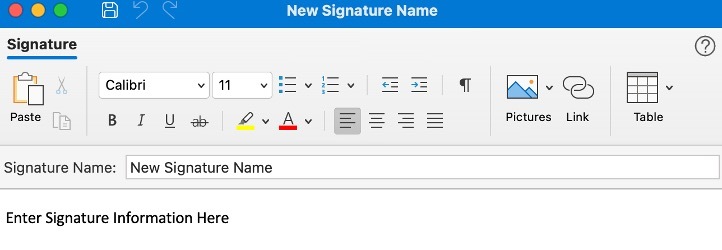
Copy the signature that you created in Step 1, paste it into the Signature box, then click OK to save.
The signature will auto-populate when you create a new e-mail
|
Before you begin
You will need:
- Your regular Microsoft 365 account already configured on the Mac.
- Full Access to the shared mailbox. Outlook for Mac currently supports shared mailboxes using Full Access permissions.
- Send As permission as well if you need messages to be sent using the shared mailbox address rather than your own.
- The shared mailbox address, for example
department@yourorganization.ca.
Outlook for Mac (Modern)
These instructions are for the current/modern Outlook for Mac, not Legacy Outlook.
- Open Outlook.
- From the macOS menu bar, select Tools → Accounts.
- Select your regular Microsoft 365 account.
- Select Delegation and Sharing.
- Select the Shared With Me tab.
- Click the + button.
- Search for the shared mailbox by name or email address.
- Select the mailbox.
- Click Add.
- Close the Accounts window.
The shared mailbox should now appear in Outlook's folder pane. Microsoft documents this as the supported method for opening a shared or delegated mailbox in Outlook for Mac.
Sending from the shared mailbox
- Select New Email.
- Display the From field if it isn't already visible.
- Select the shared mailbox address.
- Compose and send your message.
See Microsoft's own documentation
Legacy Outlook for Mac
Important: Legacy Outlook for Mac reached the end of Exchange Online support in October 2026. For Microsoft 365 mailboxes, users should move to the current Outlook for Mac.
- Open Outlook.
- From the macOS menu bar, select Tools → Accounts.
- Select your Microsoft 365 account.
- Select Advanced → Delegates.
- Under Open these additional mailboxes, select +.
- Search for and select the shared mailbox you want to add.
- Close the Accounts window. The shared mailbox will appear in Outlook's folder list.
Legacy Outlook for Mac does not support automatic mapping of shared mailboxes, so users generally need to add the mailbox themselves.
Sending from the shared mailbox
When composing a message, select the shared mailbox from the From field. The address can appear there even if you do not have permission to send from it, but the message will fail unless you have Send As or Send on Behalf permission.
New Outlook for Windows
In New Outlook, a shared mailbox may appear automatically after IT grants you access. If it was just added, restart Outlook first and allow a few minutes for the change to take effect.
Add the shared mailbox manually
- Open Outlook and select Mail.
- In the folder pane, right-select your account name.
- Select Add shared folder or mailbox.
- Enter the shared mailbox name or email address.
- Select the mailbox to add it.
The mailbox will appear under Shared with me in the folder pane. Expand it to access Inbox, Drafts, Sent Items, and its other folders.
Sending from the shared mailbox
- Select New → Mail.
- On the Options tab, select Show From if the From field isn't already displayed.
- Select From and choose the shared mailbox.
- If it isn't listed, select Other email address and enter the shared mailbox address.
- Compose and send the message.
Optional: add it as a full account
New Outlook also has a newer option to add or convert a shared mailbox into an account under Settings → Accounts → Shared with me. This enables additional functionality such as automatic synchronization, notifications, rules, automatic replies, categories and unread counts. The feature may not yet be available in every version of New Outlook.
Classic Outlook for Windows
In most Microsoft 365 environments, you normally don't need to add the mailbox manually. If IT grants Full Access with automapping enabled, close and restart Outlook and the shared mailbox should appear automatically.
If the shared mailbox doesn't appear automatically
- Open Outlook.
- Select File → Account Settings → Account Settings.
- On the Email tab, select your Microsoft 365 account and select Change.
- Select More Settings → Advanced.
- Under Mailboxes, select Add.
- Enter the shared mailbox email address.
- Select OK → OK → Next → Finish → Close.
The shared mailbox will then appear in the folder pane.
Sending from the shared mailbox
- Select New Email.
- On the Options tab, select From if the field isn't already displayed.
- Select the From dropdown and choose the shared mailbox.
- If it isn't listed, select Other Email Address and enter the shared mailbox address.
- Compose your message and select Send.